


Honestly, API was a nightmare to me because I didn’t come from Technical/Coding Background but from MIS. Learning towards creating my first API was not easy because API 2.0 documentations are not straight forward and there are more dots to be connected. Considering the same, this blog will help everyone to create their first API 2.0 Request using Postman and why to wait? Lets start.
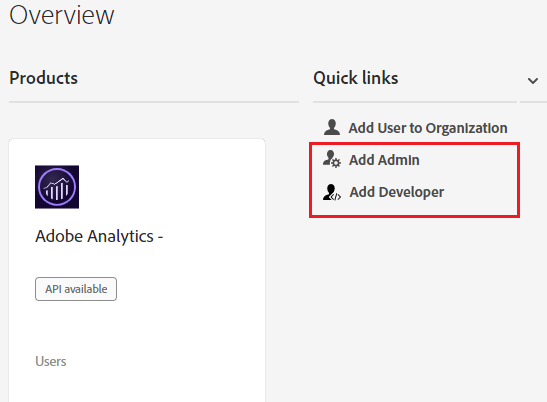
Step 01: Login to Adobe Experience Cloud, make sure you have Admin and Developer Access with Web Services. If not, get the access from your administrator.
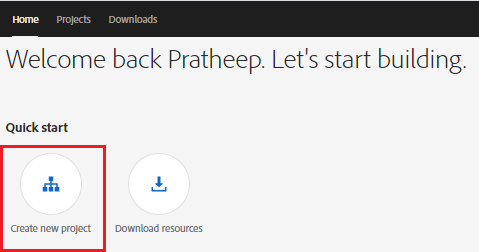
Step 02: Open one more tab and login to Adobe I/O.
Step 03: Click, ‘Create a new Project’ under Home Quick Start.
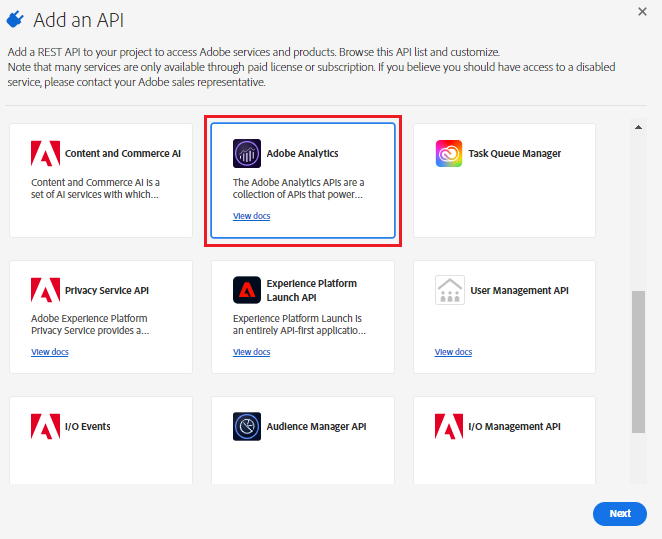
Step 04: Click, ‘Add API’ on the Project Screen 1.

Step 05: Select Adobe Analytics from the list.
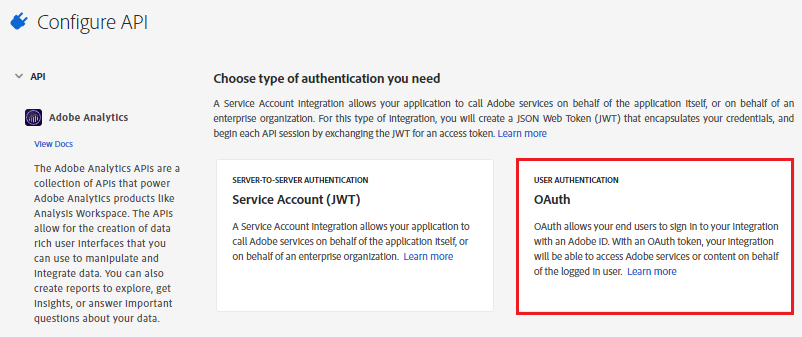
Step 06: Select User Authentication OAuth on ‘Configure API’ Screen. Service Account (JWT) is also a method to integrate, but this post covers OAuth only.
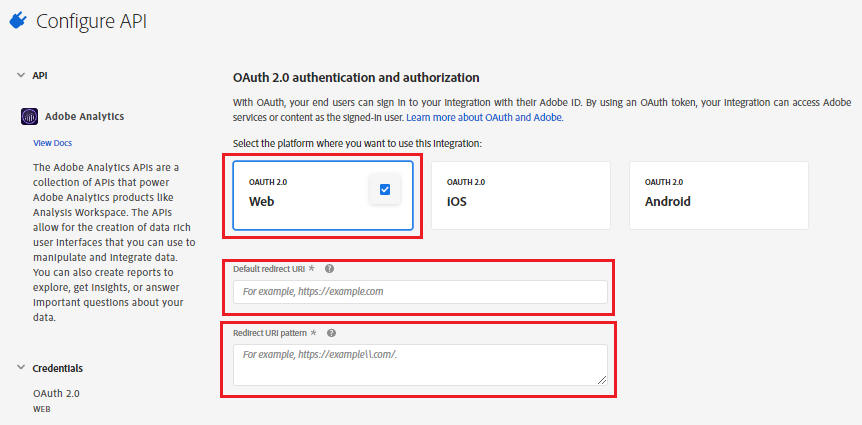
Step 07: Select Web Auth2.0 on ‘OAuth 2.0 authentication and authorization’ screen. Input the Default Redirect URL, Redirect URL pattern and save the configuration.
Default Redirect URL : https://www.adobe.com
Redirect URL Pattern : https://www\.adobe\.com
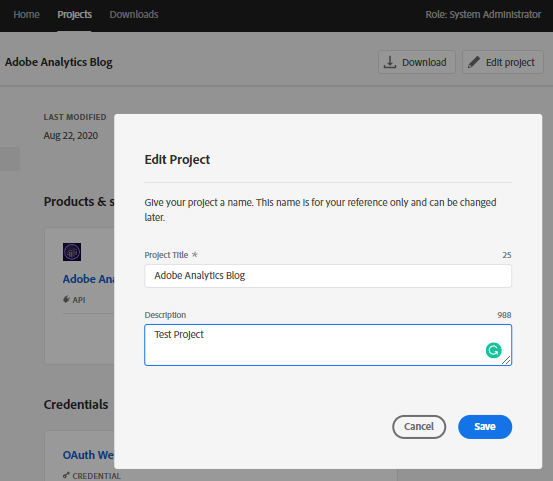
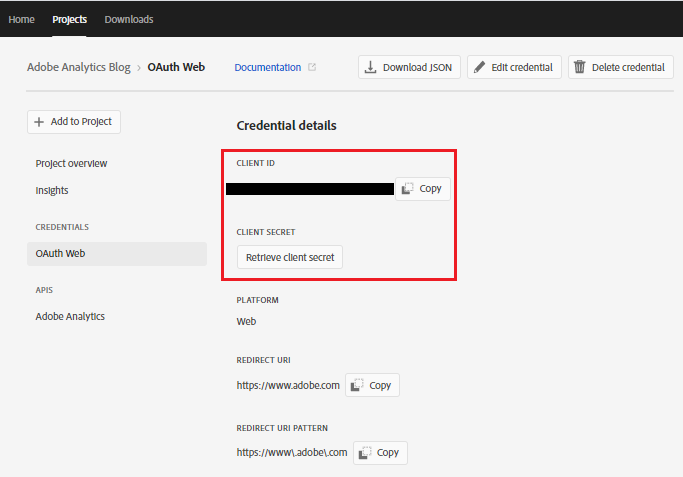
Step 08: Once saved, you should see the project under ‘Projects’ Tab. Edit the Project and give a Proper Name for your identification (Screen grab 01). Copy Client ID and Client Secret from the OAuth Web (Screen grab 02). The two values (Client ID & Client Secret) will be used in the upcoming steps.
Step 09: Open one more tab and login to Swagger UI.
Step 10: Navigate to ‘Users Tab’ and click on GET /users/me.
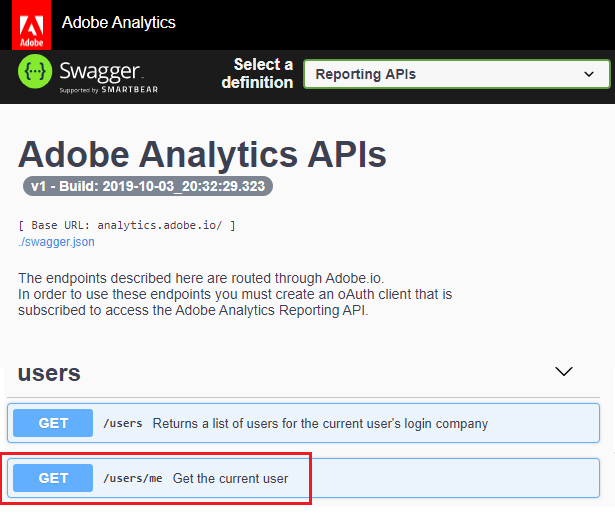
Step 11: Click Try Out and Execute. Copy the Company ID from the Request URL (See below screen grab for reference – Yellow Highlighted). The value (Company ID) will be used in the upcoming steps.

Step 12: Open Postman and Login (If Postman is outdated, please update and then login).
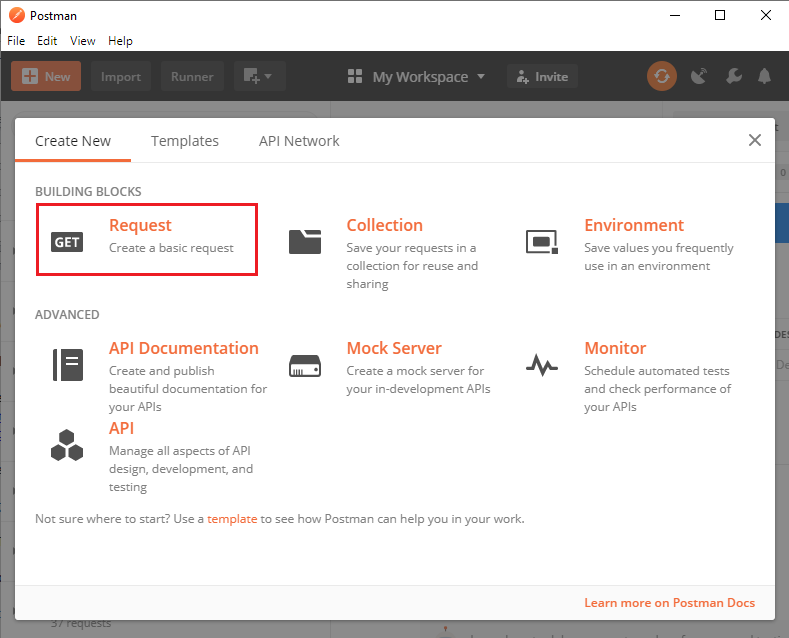
Step 13: Create a new ‘Request (GET)’ and add the Request Name. For this exercise, have added the Request Name as ‘Adobe Analytics Blog’.
Step 14: Click on the Request created, change the method to ‘POST‘ and add the URL to the ‘POST’.
POST URL : https://analytics.adobe.io/api/Company ID/reports
The Company ID in the above URL is from the Step 11.

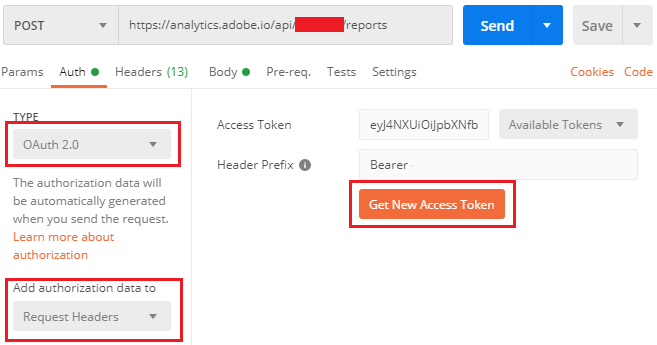
Step 16: Click on ‘Authorization Tab’ under the ‘POST’ URL and select OAuth2.0 from the drop down Type. Click ‘Get New Access Token’.
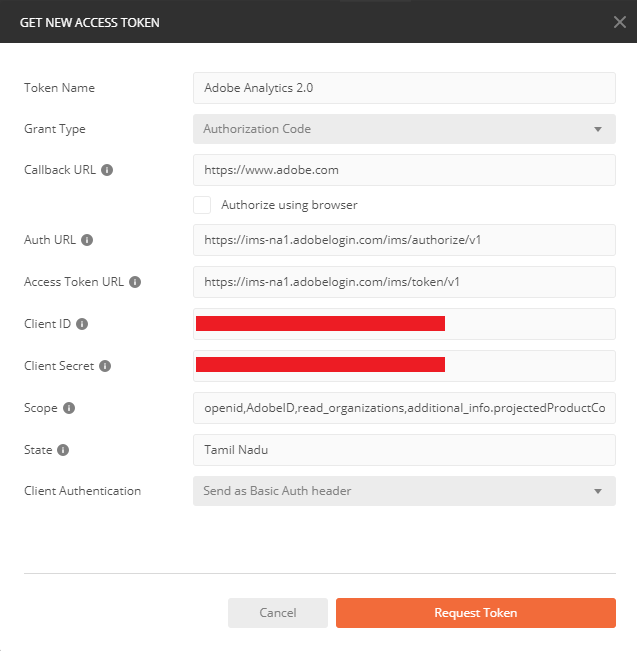
Step 17: Input the below values to the ‘Get New Access Token’ pop-up and request for token.
Token Name : Adobe Analytics 2.0
Grant Type : Authorization Code
Callback URL : https://www.adobe.com (Don’t enable Authorize using browser)
Auth URL: https://ims-na1.adobelogin.com/ims/authorize/v1
Access Token URL : https://ims-na1.adobelogin.com/ims/token/v1
Client ID : Copied from Step 08.
Client Secret: Retrieved and copied from Step 08.
Scope: openid,AdobeID,read_organizations,additional_info.projectedProductContext,additional_info.job_function
State : Your State
Client Authentication : Send as Basic Auth Header
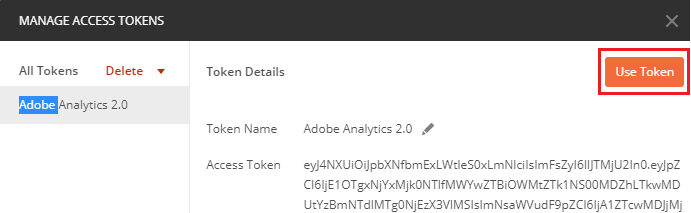
Step 17: Once you click ‘Request Token’, you need to authenticate using your Experience Cloud ID credentials. Once token is generated, click on ‘Use Token’ at the top right.
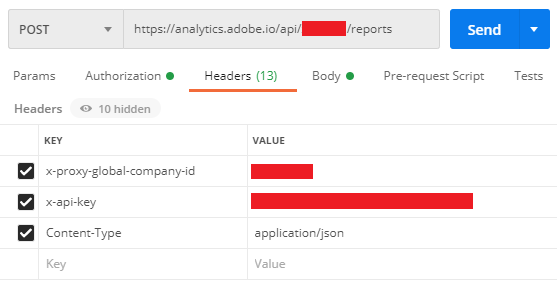
Step 18: Click on the ‘Headers Tab’ and add the below Key Value pairs.
x-proxy-global-company-id : Company ID copied from Step 11.
x-api-key : Client ID copied from Step 08.
Content-Type : application/json
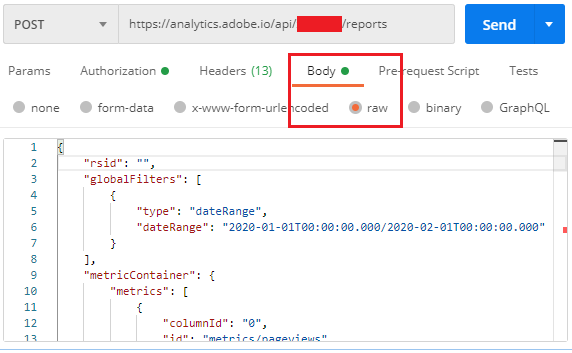
Step 19: Click on ‘Body Tab’ and select ‘raw’. Here is where we need to add the request.
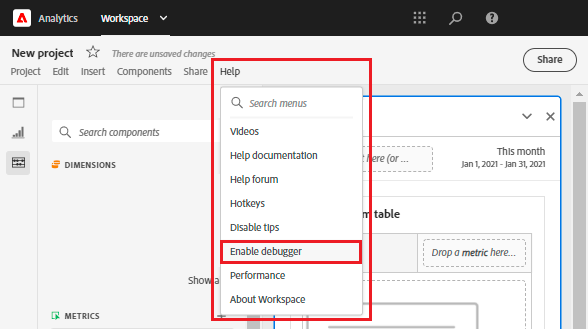
Step 20: Go to Workspace and open a new Project. Click ‘Help’ section inside the Workspace section (Not the Analytics section at the top) and ‘Enable Debugger’.
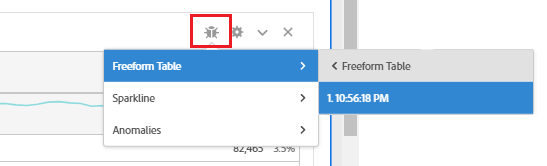
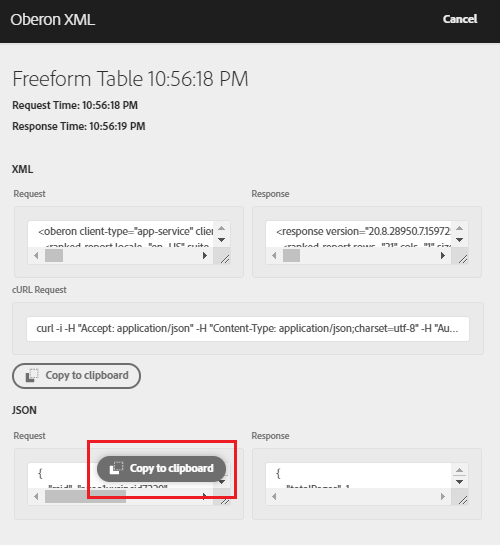
Step 22: The browser will force reload after the pop-up confirmation on enabling debugger. After reload, you should see the below ‘Oberon Icon’ on your Free Form Table. Build your Free Form and click on the Free Form Table under the Oberon Icon.
Step 22: Copy the JSON Request from the ‘Oberon XML Tab’ once opened.
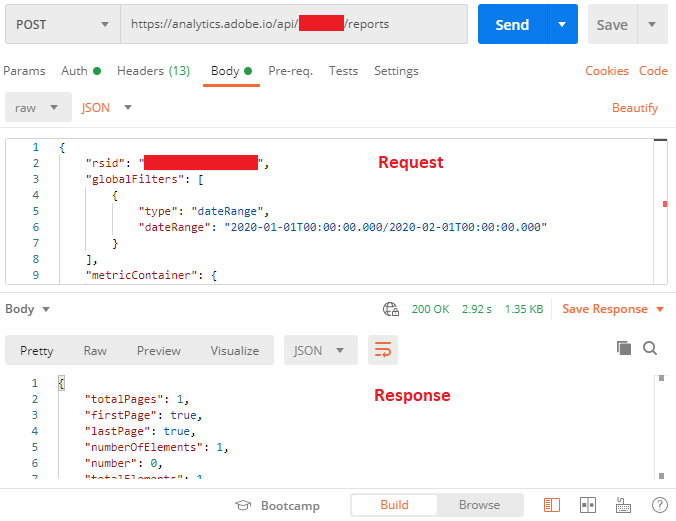
Step 23: Paste the request to the Postman ‘Body Tab’ i.e. raw (Step 19) and send the request.
Step 24: You should now able to see the response that should match the data you have seen in the Workspace.
Hurray, you have now successfully created your first Adobe Analytics API 2.0 Request.
Below are the notes to be considered while creating your first API 2.0 Request:
– If you are unable to access Adobe I/O, get necessary access that include Web Services, Administrator and Developer.
– If you have access to multiple companies, make sure that you select the same company across multiple tabs.
– Even if the UI shown above for the exercise changes in the future, the steps will be valid.
Enjoy creating Adobe Analytics API 2.0 Requests based on Business Requirements.